Free shipping on orders over $100

Cart

Your cart is currently empty.

Continue shopping

1 / 5

Butterfly Stained Glass Mosaic Kit

$56.00 USD $79.00 USD Save $23.00 USD
Quantity

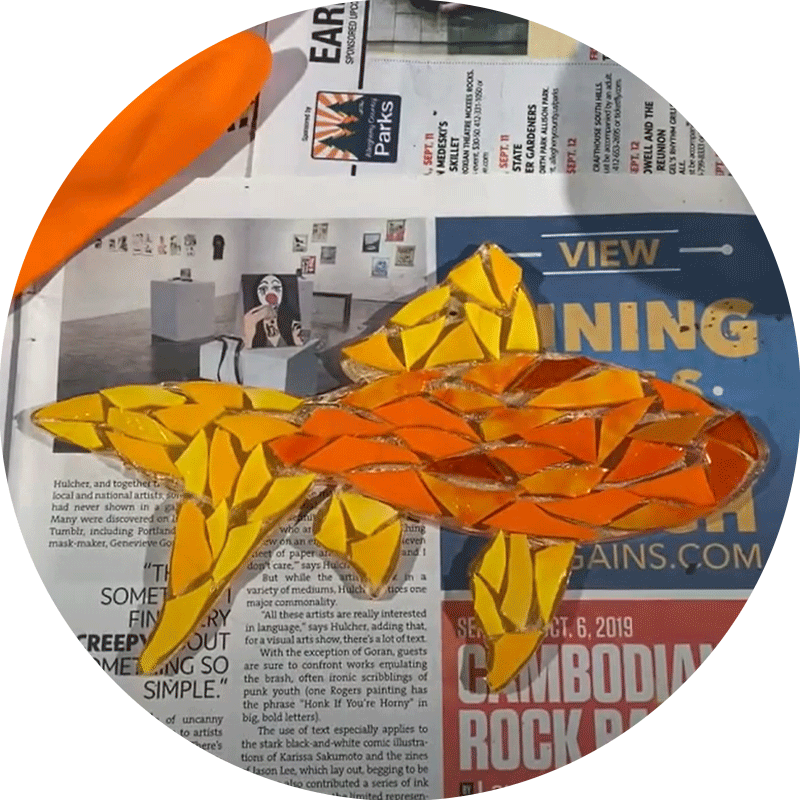
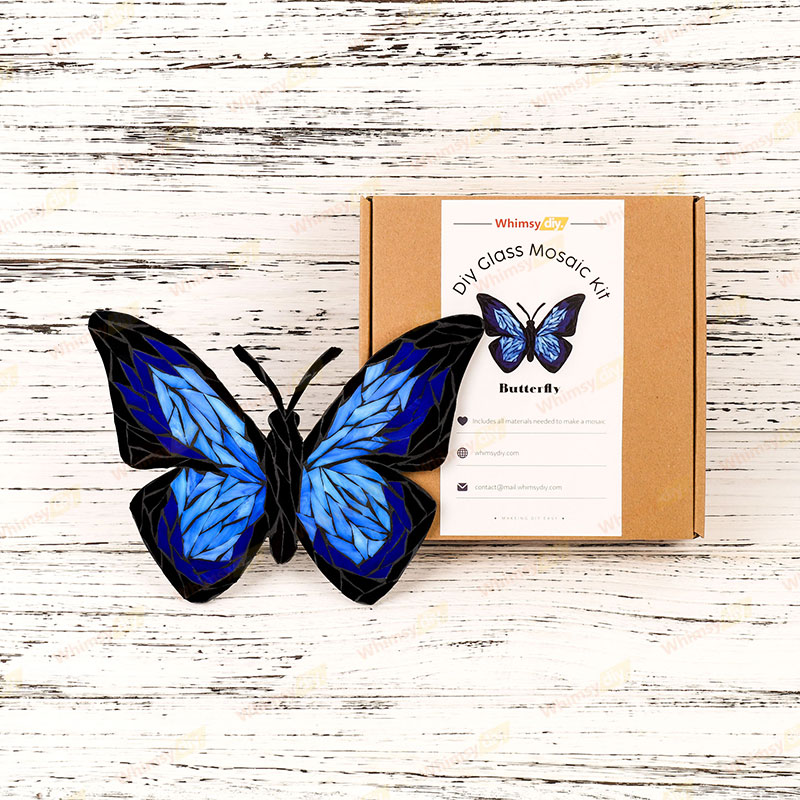
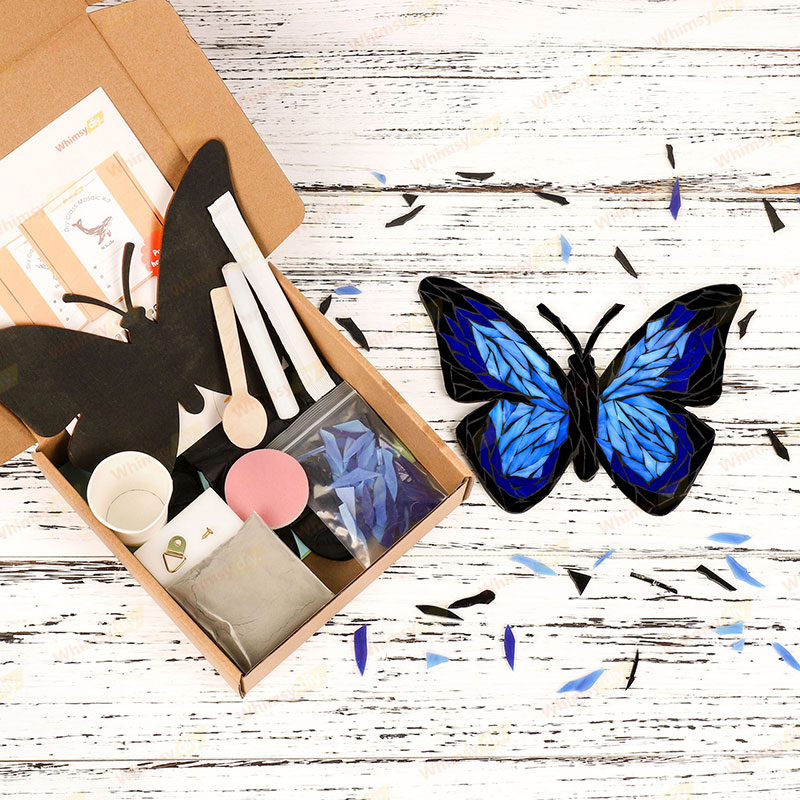
With vibrant shades of sapphire, cobalt and ice blue against a bold black outline, this striking design captures the delicate beauty and freedom of a butterfly in flight. Perfect for beginners and seasoned mosaic artisans alike, this kit contains everything you need to make a stunning work of art.

Why choose us?
✅ FOR ALL SKILL LEVELS: Step-by-step instructions and video tutorials guide you every minute from mixing grout to final assembly.
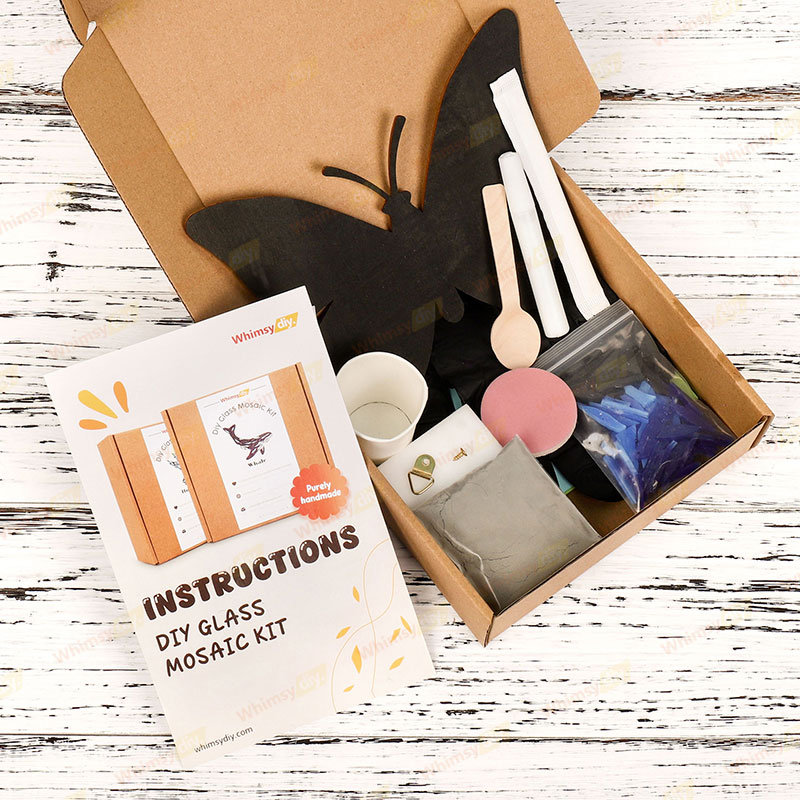
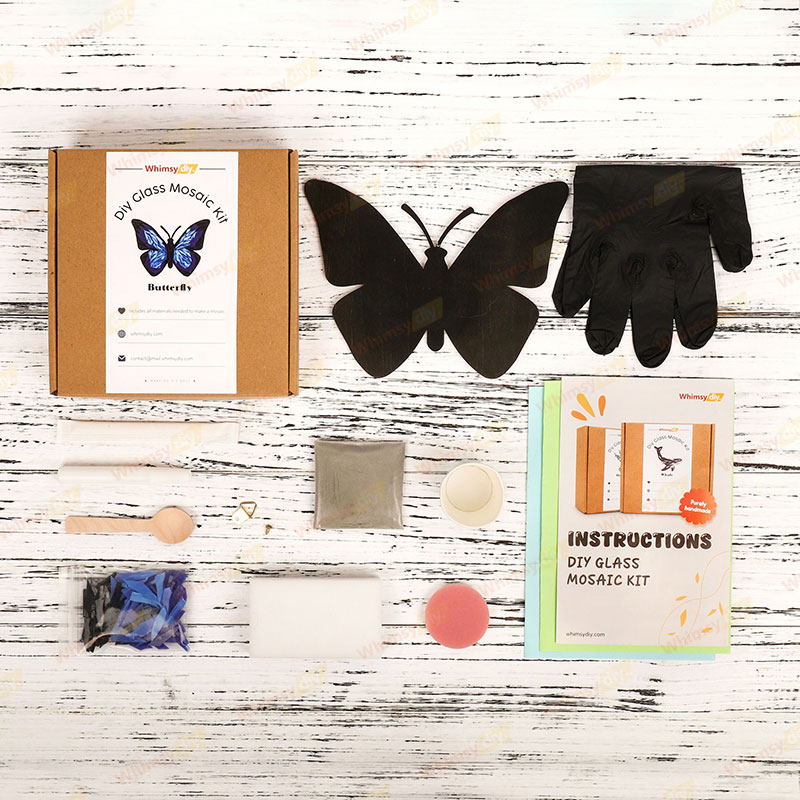
✅ EVERYTHING INCLUDED: illustrated step-by-step instructions, video tutorials, wooden backing board, crushed glass of specified pattern, grout, 1 bottle of glue, 2 sheets of work mat paper, latex-free gloves, mini spoon, wooden stick for mixing grout, foam sponge, abrasive sponge and back hook!
✅ TIMELESS DESIGN: The butterfly represents new beginnings and growth, making it a meaningful craft and display piece.
✅ GUARANTEED SUCCESS: Ensures professional results even for beginners.

When finished place your vibrant artwork in a sunny window, on a shelf, or as a holiday centerpiece.

Size
About 8 in (20.5 cm) .

Everything necessary is provided

Butterfly Stained Glass Mosaic Kit Butterfly Stained Glass Mosaic Kit Butterfly Stained Glass Mosaic Kit Butterfly Stained Glass Mosaic Kit Butterfly Stained Glass Mosaic Kit

How do you do glass mosaic art?

1. Apply adhesive
Apply some glue to the wooden backing and attach the glass pieces according to the patterned grain on the backing.
2. Grouting the mosaic
Once the grout is dry, use an abrasive sponge to gently wipe away any grout residue from the surface of the tile. Rub the tiles again with a foam sponge to make them shine.
3. Cleaning and polishing
Once the grout is dry, use an abrasive sponge to gently wipe away any grout residue from the surface of the tile. Rub the tiles again with a foam sponge to make them shine.
1 / 3

You may also like