Free shipping on orders over $100

Cart

Your cart is currently empty.

Continue shopping

1 / 5

Gnome Glass Mosaic Kit | DIY Arts & Crafts Kit for Adults | Red

From $40.00 USD
Size
Quantity

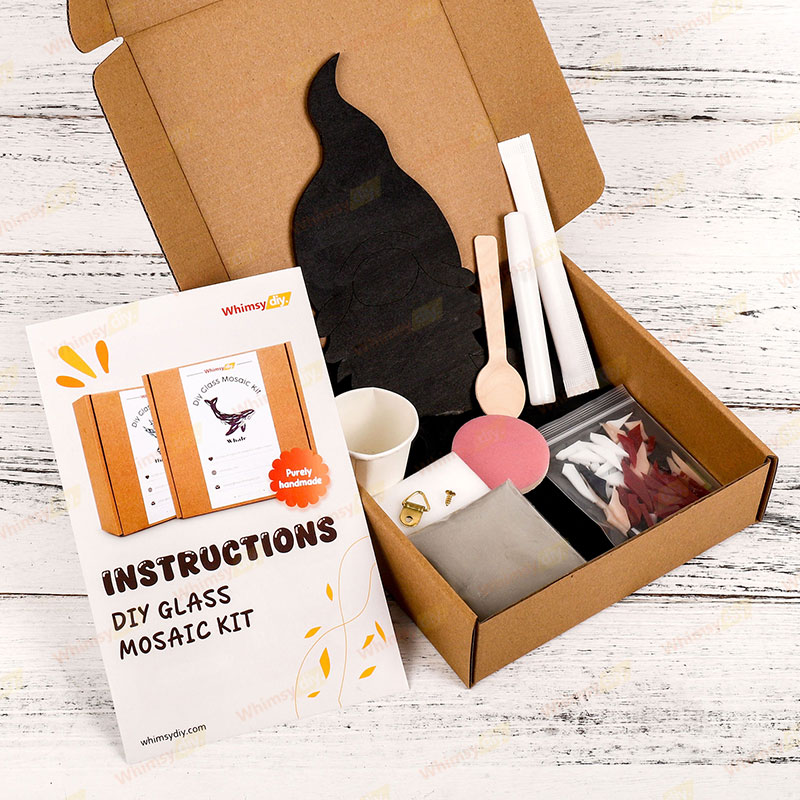
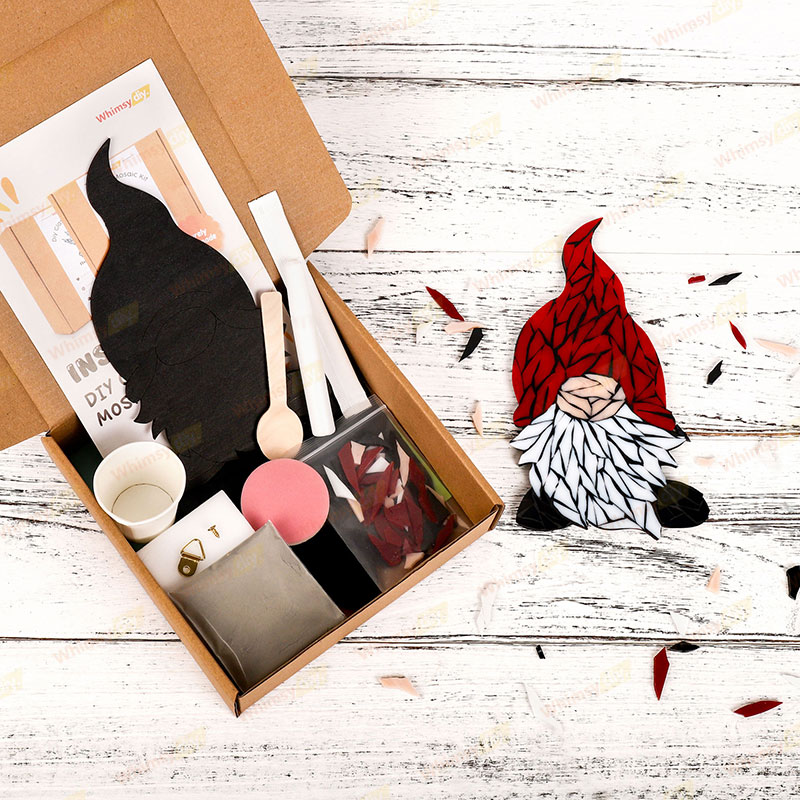
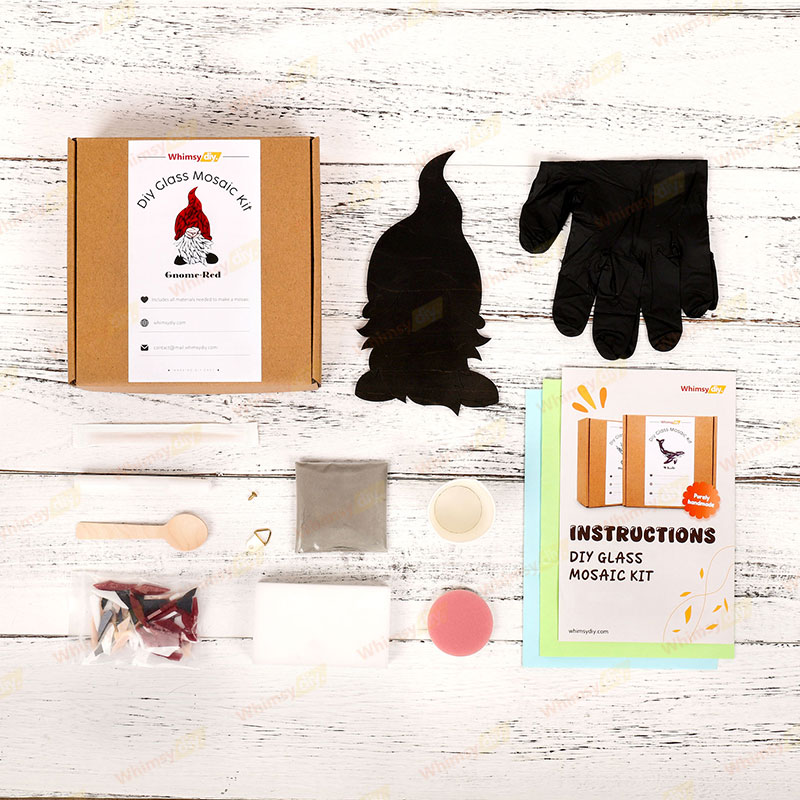
Add a touch of charm and magic to your decor with our Whimsical Gnome Glass Mosaic Kit! Add whimsy and warmth to your garden, patio or cozy indoor space. Ideal for both beginners and experienced mosaic crafters, this kit contains everything you need to make a stunning work of art.

Why choose us?
✅ FOR ALL SKILL LEVELS: Step-by-step instructions and video tutorials guide you every minute from mixing grout to final assembly.
✅ EVERYTHING INCLUDED: illustrated step-by-step instructions, video tutorials, wooden backing board, crushed glass of specified pattern, grout, 1 bottle of glue, 2 sheets of work mat paper, latex-free gloves, mini spoon, wooden stick for mixing grout, foam sponge, abrasive sponge and back hook!
✅ TIMELESS DESIGN: Gnomes symbolize luck, protection and harmony, making this mosaic a thoughtful guardian for your home or garden.
✅ GUARANTEED SUCCESS: Ensures professional results even for beginners.

When finished place your vibrant artwork in a sunny window, on a shelf, or as a holiday centerpiece.

Everything necessary is provided

Gnome Glass Mosaic Kit | DIY Arts & Crafts Kit for Adults | Red Gnome Glass Mosaic Kit | DIY Arts & Crafts Kit for Adults | Red Gnome Glass Mosaic Kit | DIY Arts & Crafts Kit for Adults | Red Gnome Glass Mosaic Kit | DIY Arts & Crafts Kit for Adults | Red Gnome Glass Mosaic Kit | DIY Arts & Crafts Kit for Adults | Red

How do you do glass mosaic art?

1. Apply adhesive
Apply some glue to the wooden backing and attach the glass pieces according to the patterned grain on the backing.
2. Grouting the mosaic
Once the grout is dry, use an abrasive sponge to gently wipe away any grout residue from the surface of the tile. Rub the tiles again with a foam sponge to make them shine.
3. Cleaning and polishing
Once the grout is dry, use an abrasive sponge to gently wipe away any grout residue from the surface of the tile. Rub the tiles again with a foam sponge to make them shine.
1 / 3

You may also like